Introduction
Welcome to the official documentation for Jotter, a minimalist, text-focused Ghost theme designed for writers and bloggers. With a clean, typography-led design, Jotter works beautifully without images while supporting the full range of Ghost features and flexible customization options.
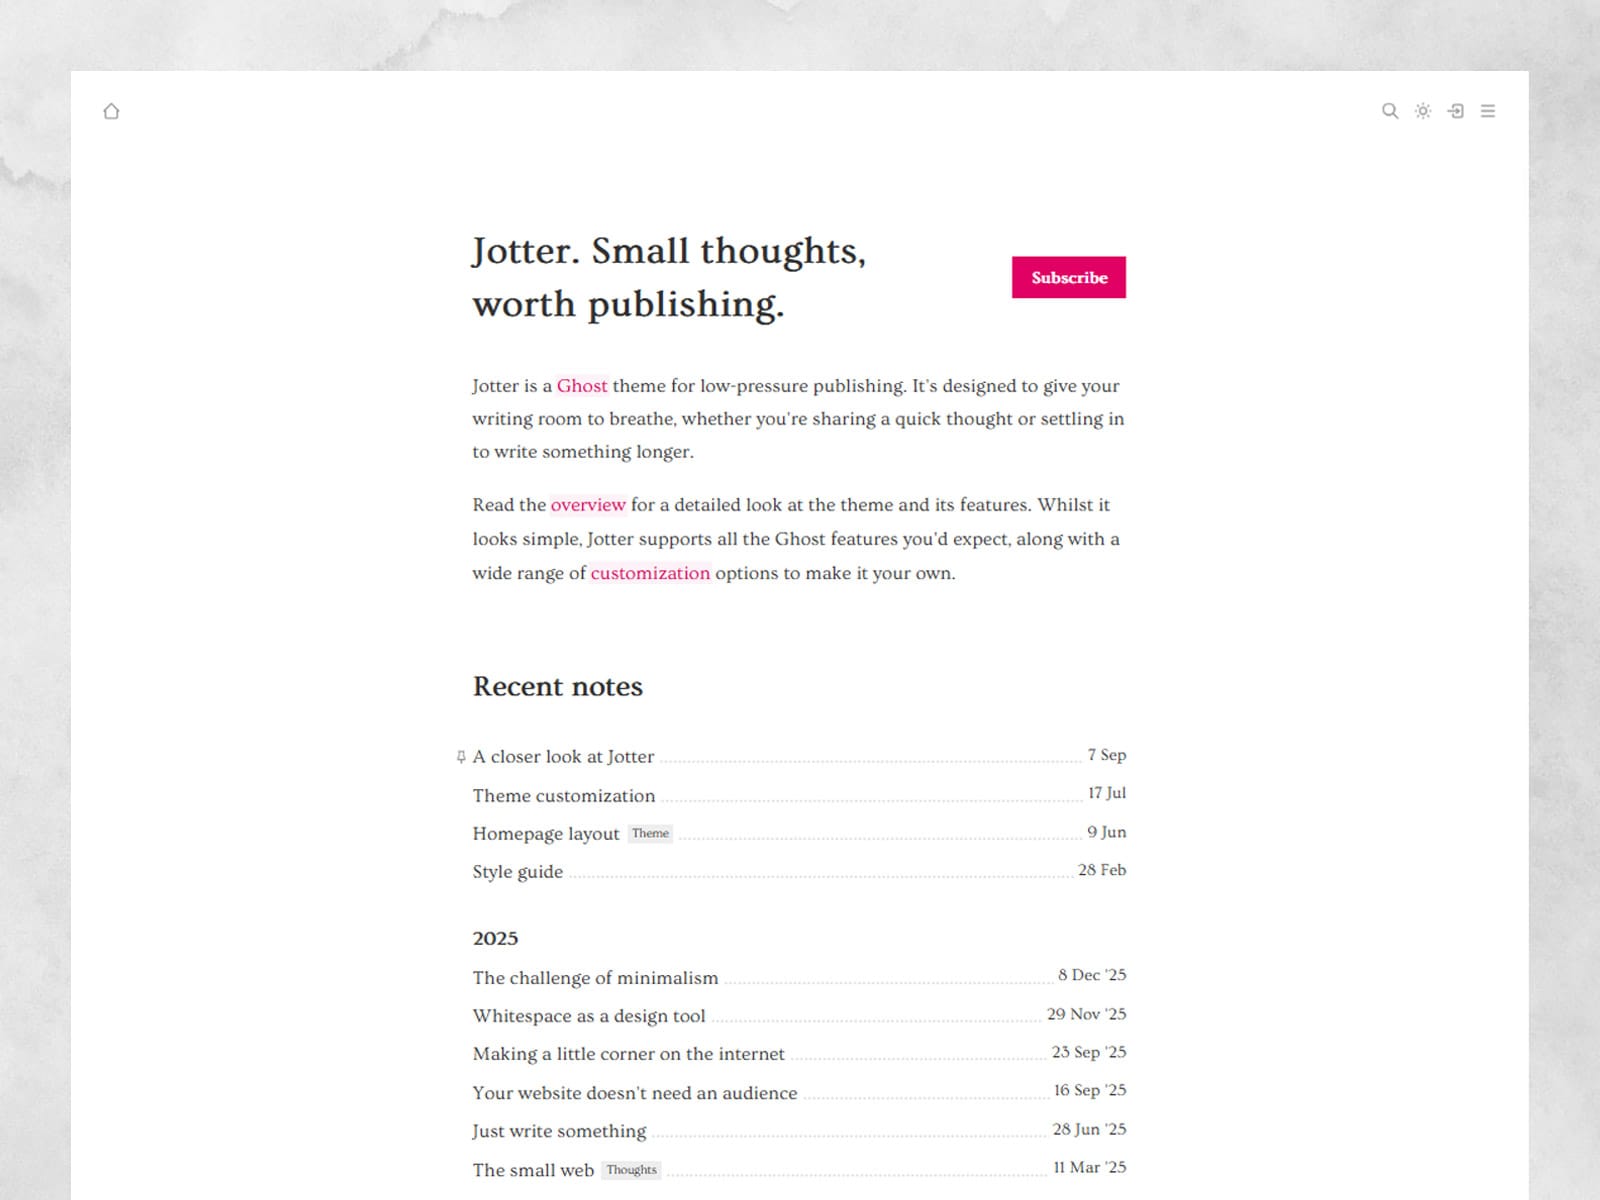
This guide will provide detailed instructions on everything you need to get the most out of theme including initial setup, configuration and custom theme options.
Please note that while this documentation covers the Jotter theme in detail, it assumes a foundational understanding of the Ghost CMS platform. If you are new to Ghost, we recommend familiarizing yourself with the official Ghost Help Center for guidance on core concepts.
Installation
- Log in to your Ghost Admin dashboard.
- Navigate to Settings → Theme in the left-hand sidebar, or scroll down to the Theme section.
- Click the Change theme button.
- At the top right, click Upload theme
- Select the
jotter.zipfile you received upon purchase. - Wait for the upload and validation process to complete—Ghost will automatically check the theme's structure and compatibility.
- Once uploaded, click Activate to make Jotter your live site theme.
Theme settings
Navigate to Settings → Design and branding and click Customize. In the right-hand sidebar under the title Design, you'll see two tabs: Brand and Theme.
Firstly let's look at the Brand options; these are the default Ghost theme settings:
Ghost theme settings
- Accent color - In the Jotter theme the accent color is used for buttons, links and to highlight inline links in your post content.
- Publication icon - This icon (or favicon) appears in browser tabs, bookmarks, history, and search engine results, helping users easily identify your site. The icon should be clear and simple to ensure it's legible at small display sizes.
- Publication logo - Add your main site logo here, which will be displayed in the header and footer. If no logo is added the site title will be displayed as text instead.
- Publication cover - This is a banner image that is displayed at the top of post index pages on some themes, and as the site's open graph image.
- Typography - Here you can change Jotters's default heading and body fonts with a curated selection of alternatives provided by Ghost. By default Jotter uses Ovo, an easy-reading serif font with high legibility.
Jotter theme site settings
Switch from the Brand tab to Theme and you'll see the following options:
- Text size - Choose from three options: Standard, Smaller and Smallest.
- Color scheme - Choose from six pre-defined color schemes: Neutral, Sand, Ocean, Forest, Rose and Lavender. Use the demo site customizer to see them in action.
- Background pattern - Adds a subtle pattern/texture to the site background. There are six to choose from: None, Dimple, Weave, Pinstripe, Dots and Herringbone
- Dark mode - Jotter has built-in dark mode support. With this setting you can choose whether to force Light or Dark modes, allow the user to decide with User Toggle, or automatically match the visitors browser/OS settings with System. If User Toggle or System are selected, a toggle will be displayed in the header allowing the visitor to switch color schemes.
- Dark mode logo - If added this will be displayed in place of the standard Publication logo when in dark mode.
- Home icon - Choose whether to display the home icon in the site header.
- Menu icon - Choose whether to display the menu icon in the site header.
- Search icon - Choose whether to display the search icon in the site header.
- Show tags - Choose whether to enable tag visibility across the site.
- Show authors - Choose whether to enable authors visibility across the site.
- Show recommendations - Choose whether to show recommendations in the primary navigation menu.
- Footer credit - Override the default footer credit text with your own content. Use HTML to add links, etc.
Jotter theme homepage settings
After the site wide settings, you'll see a section for homepage settings.
- Homepage content - Choose between Header and content, and Latest post. See the Homepage section for more information about these settings.
- Post feed style - Choose between Recents posts and Tag groups. See the Homepage section for more information about these settings.
Jotter theme post settings
After the homepage settings, you'll see a section for post settings.
- After article show... Choose between Nothing, Previous and next posts links and Recent posts.
- Post date - Choose whether to show the post date in the article header.
- Share icon - Choose whether to show a share icon at the end of the article.
Site navigation
There are two navigation areas in Jotter that we need to consider: the main header menu and the footer menu.
Main header menu
The main header menu is opened using the hamburger icon on the right side of the header. To populate this menu go to Settings → Navigation and click Customize. In the modal (pop-up) that opens, make sure the Primary navigation tab is selected. You can add your menu links here. The hamburger icon will only display if the Menu icon option is turned in in theme settings.
Tags, Authors and recommendations will also be displayed in the main menu if they are turned on in theme settings
Footer menu
To populate this menu go to Settings → Navigation and click Customize. In the modal (pop-up) that opens, select the Secondary navigation tab. You can add your footer menu links here.
Homepage
Using Jotter's homepage settings you can customize the look and functionality of the homepage.
There are two homepage content settings: Header and content, and Latest post.
Header and content
With this setting, a homepage header is displayed with the site logo/title and a subscribe button (if applicable). You can then display custom homepage content before and after the post feed.
To show content before the post feed, create a new page with the title Homepage top and slug homepage-top . Content added to this page will be displayed before the post feed.
To show content after the post feed, create a new page with the title Homepage bottom and slug homepage-bottom . Content added to this page will be displayed after the post feed.
Note: For both Homepage top and Homepage bottom pages, change the page template to Content Source. This template is blank and not indexable by search engines, so as not to create duplicate content between the pages themselves and the homepage.
Latest post
Use this setting for an ultra-minimalist blog with your content front and center. The latest post is shown, followed by the post feed. You can still add some custom content in this mode if you like, using the Homepage bottom page content which will display after the post feed.
Post feed style
Choose between two options for displaying posts on the homepage: Recent posts or Tag groups.
Recent posts shows your latest posts in date order
Tag groups shows each of your sites populated tags and posts that are using them as their primary tag. You should use tags for all your posts if this option is selected to ensure they are easily reachable.
Posts
Featured posts
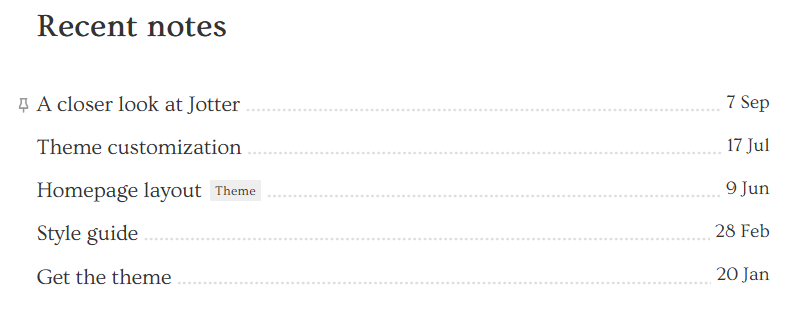
Jotter's featured posts acted as pinned posts. They remain at the top of the post feed, with a pin icon.
External link posts
You can create posts that act as external links in the post feed, to content outside the site. To do so, tag the post with the internal tag external . Jotter will find the first link in the post content and use that as the post feed link, rather than the posts permalink. An icon is added to signify that the link is external.

Note: For external link posts, change the page template to Content Source. This template is blank and not indexable by search engines, as we are just using the post as a place to put a link.
Global post content
You can create page content that is shown at the bottom of every post, such as a subscribe CTA or anything you'd like. Create a new page with the title Post bottom and slug post-bottom . Any content added to this page will be displayed after the post content for all posts.
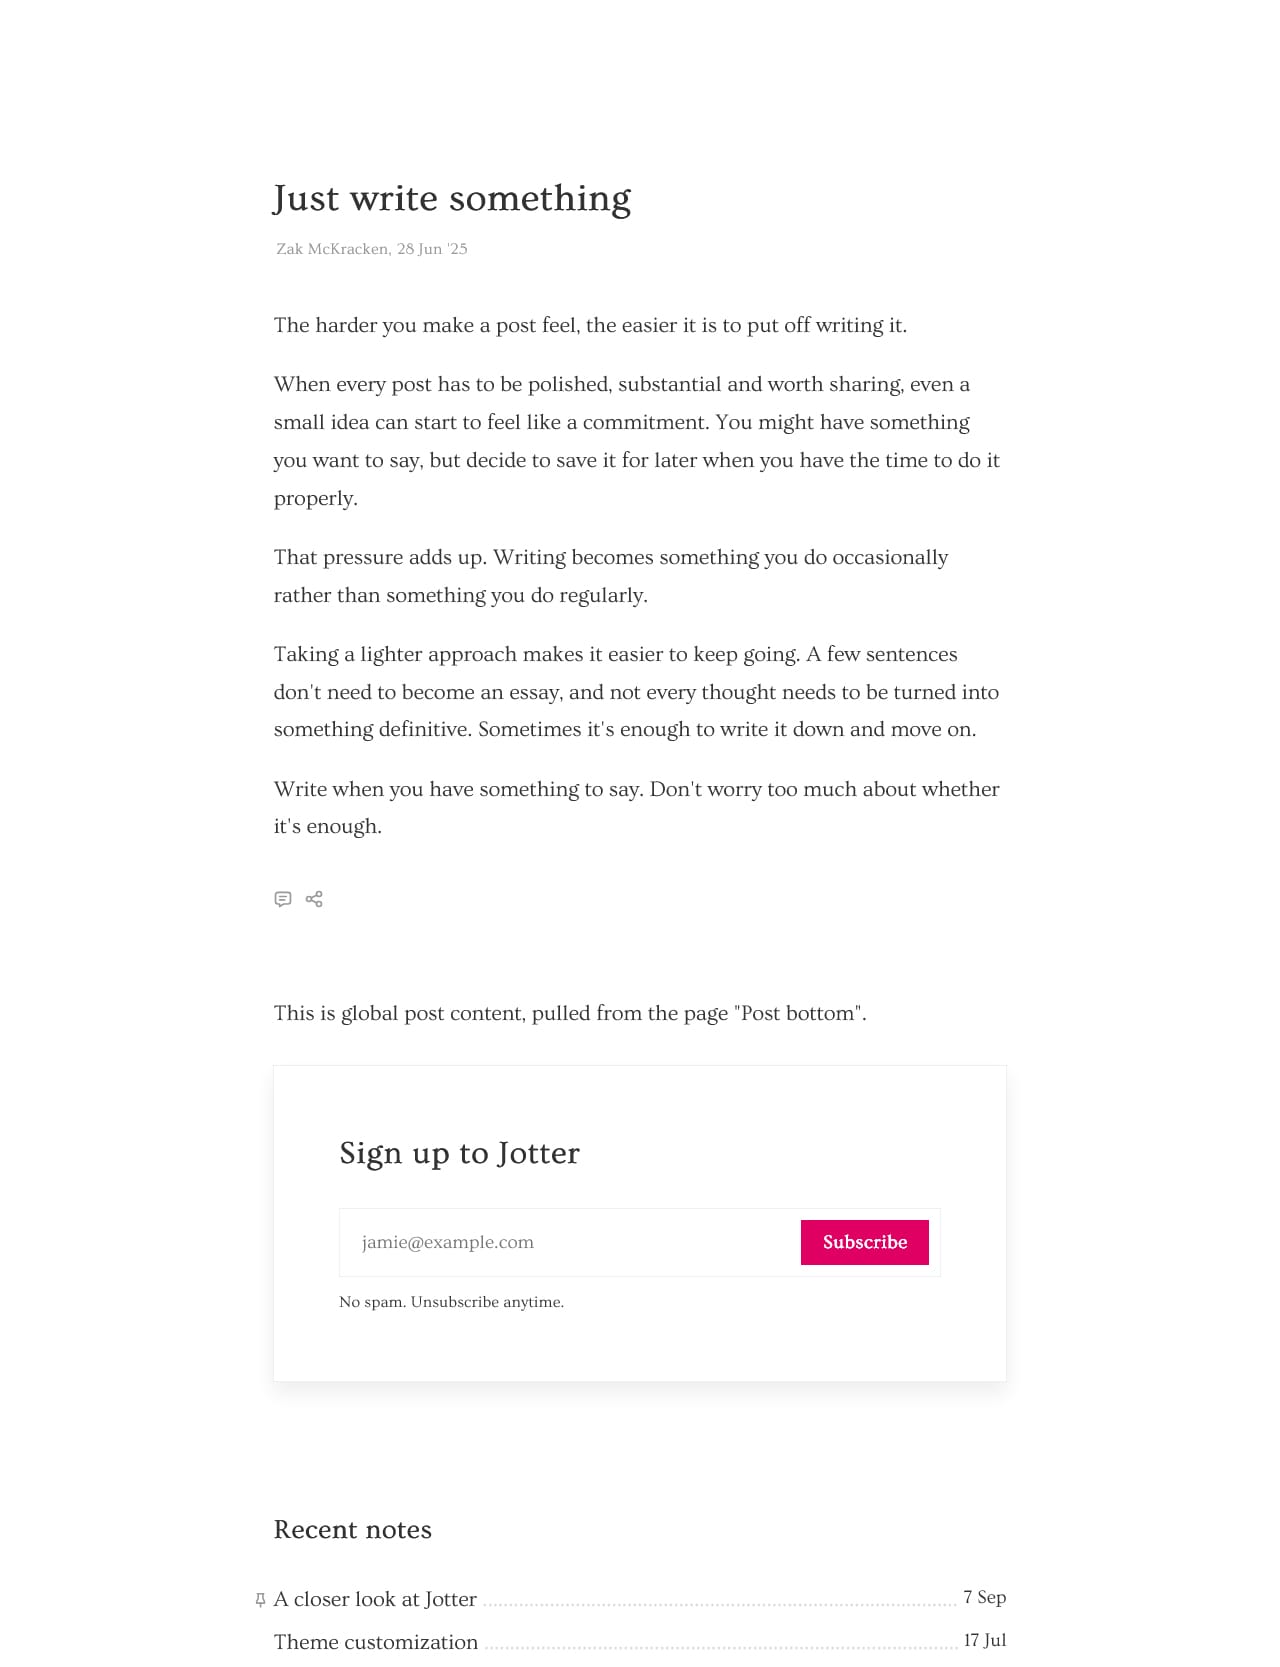
Note: For the Post bottom page, change the page template to Content Source. This template is blank and not indexable by search engines, so as not to create duplicate content.
Tags
Tags are only shown on the site if the Show tags theme option is turned on. If it is, a posts tags are displayed at the end of the post, and on post snippets, and in the main navigation menu. These link to the Tag archive which displays the tag title, description (if added) and a list of all the posts in that tag.
Authors
Authors are only shown on the site if the Show authors theme option is turned on. If it is, the post author is displayed at the start of the post, and published authors are displayed in the main navigation menu. These link to the Author archive which displays the author's name, cover image, bio and a list of all that author's posts.
Publication Language
Change Ghost's publication language by going to Settings → Publication Language. This will change the language of Ghost's native elements, such as the sign-up and subscribe process, comments and emails.
Translations
Jotter is translation ready. To create a translation, go to Settings → Theme and click in the three dots opposite the active theme name and click Edit code.
In the file editor open the folder locales where you will see a file called en.json. Open this file and copy the contents to your clipboard.
Now click the small plus (+) sign at the top of the filed editor sidebar. Create a new file locales/xx.json where xx is your desired country code. E.g. Spanish would be locales/es.json . Open your new file and paste in the content you copied from en.json. You can now update the file with your translated terms, which will be picked up across the site if that languages Publication Language is active.
Further Support
Our aim is provide clear and comprehensive documentation to help you get the most out of your theme. However if you encounter any difficulties or bugs, or have any feedback or suggestions, please feel free to contact us here.